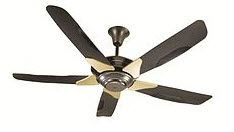
Replace an overhead light fixture with a ceiling fan and you'll lower cooling and heating costs, not to mention improve the look of the room. Typically ceiling fans are available in 36-, 42- and 52-inch diameters and come in an array of designs, styles and colors. They are sold primarily at lighting retailers, home centers and lumber yards. A ceiling fan is often sold with an optional lighting fixture that doubles its use.
Another popular accessory is a remote control unit that gives the user the ability to turn the fan on and off without getting up. This is great if you are in bed and want to turn the fan off or on but don’t want to get up. Some devices can be controlled with an app providing you the extra convenience of being able to control the fan with your phone.
To meet most building codes you need a ceiling height of at least 8 feet to install a ceiling fan. For the fan to work efficiently there should be at least 8 inches between the ceiling and the fan blades. Many fans have a dual mount feature which means they can be installed snug to the ceiling or dropped on a bar for a room with a high ceiling.
The diameter of the ceiling fan blades needed to effectively cool an area is determined by the size of the room it will service. Generally a 36” diameter fan meets the needs of a room measuring 9’ x 12’. A room 12’ x 15’ or smaller is well served with a 42” diameter fan. And a 52” ceiling fan is suitable for larger areas.
A ceiling fan is heavy and can wobble back and forth during operation so it's important to securely attach it to the ceiling. It comes with a bracket designed to attach to an electrical box. If the box in your ceiling is attached directly to the ceiling joists then you can attach the bracket directly to the box. If you are not sure how the ceiling box is attached to the ceiling or if it appears loose the best method of securing a fan to the ceiling is with a specially designed ceiling fan bracket and box that replaces the existing electrical box.
The bracket is designed for installation through the existing hole in your ceiling. It has a heavy suspension bar that you pass through the box opening and then twist it so that it is perpendicular to the ceiling joists. You then expand the bar by turning a nut to drive the spiked ends into the ceiling joists. A heavy duty ceiling box is attached to the bar where the fan is hung. This bracket meets most building codes but check with your local building department before buying one.
All ceiling fan units come with complete installation instructions. Hooking up the wiring is not difficult and can be an easy DIY. Most wire to wire connections can be easily achieved with electrical wire connectors but if you are not familiar with electrical work you are better off hiring an electrician to do the actual wiring. If you decide to be your own electrician, be sure to turn the power 'off' at the main fuse or circuit breaker panel before you begin work. Any wire to wire connections can be made with either screw-on wire connectors or by soldering and using heat shrink. The former is much easier than soldering, but just as reliable.
If the existing wiring has only one switch leg controlling the existing overhead light and fishing new wires through the walls is not practical, consider buying the remote control device (similar to a TV control) or a pulse switch (a special switch that you flick off and on quickly to operate fan). This will give you complete control over the fan and light without needing additional wiring.